tutorial starts.
1) open adobe photoshop. pick a picture, high quality! i use this.
2) crop the picture to 100x100 px. duplicate the picture and sharpen the duplicated one. and set it to soft light.
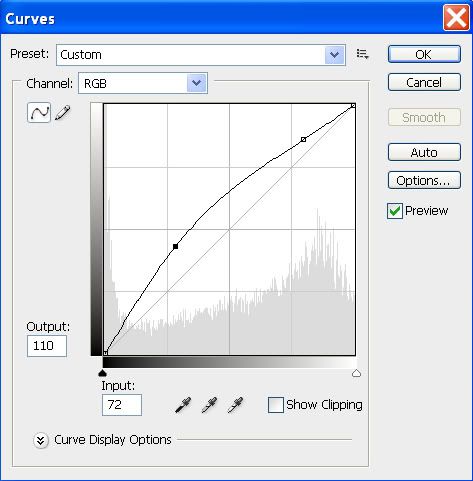
3) go to layer>new adjustments layer>curves. (click the picture below)
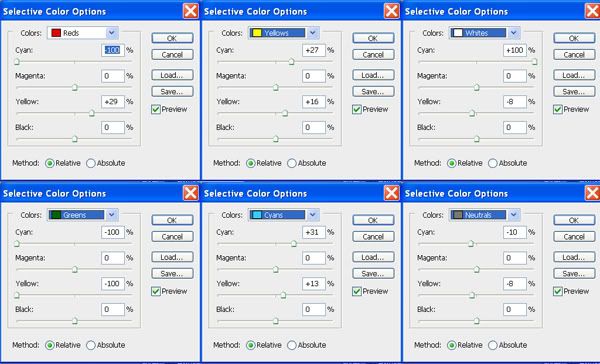
4) then, layer>new adjustments layer>selective color. then, duplicate the selective color layer. (click the picture below)
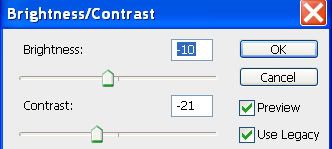
5) layer>new adjustments layer>brightness/contrast.
6) put some text and you're done!
Now, i really have to study! Wish me luck for PMR&PMRI! Also for the next Tahfiz TEST! HWAITINGGG! I think this will be my last post for the next 5 month. Sayonaraaaaaaa~ ^0^
DO NOT TAKE OUT WITHOUT MY PERMISSION!


3 comments:
yelah, the last post..
ngehx3
xbleh caye..
salam~
wwwwaaa~kiru,,
keep it up..
teach teach n teach..
akn terus mengikuti..:)
yeaah,teaching teaching.Cekgu ayu! :))
Post a Comment